 Show Posts
This section allows you to view all posts made by this member. Note that you can only see posts made in areas you currently have access to.
Pages: [1] 2
1
Other modules / no forward-proxy ports error after updating squid
« on: June 24, 2022, 09:11:49 pm »
After a squid update the service no longer works.
When I clear the proxy configuration and after a restart the service works again.
I consulted the log of squid which informs me of an "ERROR: no forward-proxy ports configured."
I tried to downgrade squid to version 4.10-1ubuntu1, but the error persists.
I need a working proxy to validate my training project.
What I find strange is that 2 virtual machines out of 3 are not impacted by this incident, and on the final server it is apparent even after redoing an clean installation.
I guess it's a package versioning issue?
zentyal.log
2
Contributions / Tips&Tricks / Features Requests / XII. Xrdp REMOTE DESKTOP. (Part 12/12)
« on: June 03, 2022, 07:09:39 pm »
XII. Xrdp REMOTE DESKTOP.
We are going to install an remote desktop(RDP) client for remote control of the administrator workstation to Zentyal, as part of maintenance in a graphical user interface.
In a terminal window enter following command line to install Xrdp:
Create the xrdp user and add it to the ssl-cert group:
Once installed, enable the service on every boot:
To check if the service are running:
It may happen that the service refuses to start, in this case reboot the server, everything will be back to normal on restart.
Once the service is active, let's go to the administration console to configure the service and the firewall.
Go to the network tab then services:

Then add a new service and name it:


Then configure the newly created service:

Fill in the fields:

Once the new service is configured, don't forget to save the changes:

Then we go to the firewall to add new a rule.
Go to the firewall tab, select filter and zentyal internal network:

Add and configure a new rule:

In my example as a security measure, I only tolerate rdp access to the administrator workstation via its mac address.
The new filter rule is added:

Don't forget to save the changes.
To take effect, we have to restart the firewall services:
After restarting the firwall services, go to the administrator workstation to initiate a remote desktop session.
In the windows search bar enter desktop and select, remote desktop connection:

A window then opens, fill in with the ip address of Zentyal:

In the second window, enter your Zentyal user and password:

And here we are on Zentyal desktop via remote desktop session:

Xrdp Source
We are going to install an remote desktop(RDP) client for remote control of the administrator workstation to Zentyal, as part of maintenance in a graphical user interface.
In a terminal window enter following command line to install Xrdp:
Code: [Select]
sudo apt install xorgxrdp xrdp -yCreate the xrdp user and add it to the ssl-cert group:
Code: [Select]
sudo adduser xrdp ssl-certOnce installed, enable the service on every boot:
Code: [Select]
sudo systemctl enable xrdpTo check if the service are running:
Code: [Select]
sudo systemctl status xrdpIt may happen that the service refuses to start, in this case reboot the server, everything will be back to normal on restart.
Once the service is active, let's go to the administration console to configure the service and the firewall.
Go to the network tab then services:
Then add a new service and name it:
Then configure the newly created service:
Fill in the fields:
Once the new service is configured, don't forget to save the changes:
Then we go to the firewall to add new a rule.
Go to the firewall tab, select filter and zentyal internal network:
Add and configure a new rule:
In my example as a security measure, I only tolerate rdp access to the administrator workstation via its mac address.
The new filter rule is added:
Don't forget to save the changes.
To take effect, we have to restart the firewall services:
Code: [Select]
sudo zs firewall restartAfter restarting the firwall services, go to the administrator workstation to initiate a remote desktop session.
In the windows search bar enter desktop and select, remote desktop connection:
A window then opens, fill in with the ip address of Zentyal:
In the second window, enter your Zentyal user and password:
And here we are on Zentyal desktop via remote desktop session:
Xrdp Source
3
Contributions / Tips&Tricks / Features Requests / XI. SECURING ZENTYAL. (Part 11/12)
« on: May 31, 2022, 05:41:17 pm »
XI. SECURING ZENTYAL
1. SECURE REPOSITORY.
Linux distributions usually come with insecure repositories in
http, so we will switch them to https as much as possible, because some
Zentyal repositories are not available in https.
To do this open a terminal window and enter the following command for the socket
support for https repositories:
From now on we can change http repositories to https.
In a terminal window:
To change the sources, just add an "s" at the end of http, in my
example below I unchecked the deb-src, see type of archives.


Save your changes with "ctrl+x" then "y" and finally hit enter.
n addition we can also change the security http repositories by a mirror
supporting https, to be chosen according to your geographical location
to limit latencies, see archive mirrors.
In my example I chose the plusserver mirror:


Once the repositories have been changed, simply reload the sources with the command
next:

Edit:
Since 20 June Zentyal HTTPS repository are available.
2. CERTIFICATE AUTHORITY.
We will add a self-signed x509 certificate to access the console
administration in https, which by default is in http.
Go to Certification Authority in the administration console:

Then create a new certificate:

Once created we can see it in the list of current certificates:

Now you have to apply the certificate to the web server, go to "Services
certificates” and tick the services you wish to certify:

To take effect, save your changes and then close the console
administration. Upon reopening and after accepting the risk, you will see
appear https in the navigation bar.

3. LDAPS CONFIGURATION.
By default the port used by the directory is 389 which is not safe, we will force
using secure port 636.
For support it is necessary to enrich the samba configuration file
found in "/usr/share/zentyal/stubs/samba/smb.conf.mas" by adding
the location of the certificate created previously.
In a terminal window:
Dans la section [global] rajoutez ces lignes:

We will restrict the access rights to the certificate key, go to the
certificates folder:

Finally we will restart the samba services:
4. FAIL2BAN CONFIGURATION.
Short presentation of fail2ban, it is an intrusion prevention system that
allows you to ban source ip addresses that attempt to connect without your knowledge to
some services, such as ssh.
We are going to install fail2ban, in a terminal window:
Enable the service on every boot:
Check the service status:
Let's move on to configuring the plugins:
Rajoutez les plugins à surveiller ainsi que le temps de bannissement:

In the example the ssh and nginx plugins have been chosen, with a time of
ban of 24 hours estimated in seconds, as well as 2 attempts maximum.
Do not forget to add to the "ignoreip" list the ip address of your
server and the administrator workstation, at the risk of being blocked by fail2ban.
Restart the service for the changes to take effect:
Check the logs:
5. PORTSENTRY CONFIGURATION.
portsentry is a "portscan" detection and blocking program, ideal
to hide services using specific ports.
Installing portsentry:
Enable the service on every boot:
Check the service status:
Configure the file with the ip addresses to ignore, those of the server and administrator station:

By default portsentry does not block any ip, we will go to the file of
configuration of it and modify so that the blocking is effective:
Set Ignore Options BLOCK_UDP/TCP to "1" for blocking support:

“Dropping Routes” section, check that the following line is uncommented:

Same for the “TCP Wrappers” section:

“External Command” section, add this long line and uncomment
KILL_RUN_CMD_FIRST with a value of “1”:

Section “Scan trigger” value “0” to “1”:

For automatic detection of the ports used, simply go to the file
/etc/default/portsentry:
Passez en mode «atcp» et «audp» puis redémarrez le service:

6. SSH CONFIGURATION.
To connect remotely to our server and maintain it, we
we need the ssh service and of course secure it to limit access.
First of all we will open port 22 on Zentyal which by default is closed, to
to be able to access the ssh via administrator post, open a terminal and enter the
following command:
Once in the configuration file uncheck port 22 and restart the service:

Let's go to the administrator workstation on which we will generate a
new pair of ssh keys, for this open a command window and enter the
next line:
This command allows us to create an rsa key pair with a length of
4096 bit.

The following message asks where to store the key pair, let the location per
default:

Fill in a robust passphrase respecting the security policy with the help of the
KeePassXC password manager:

Once the key pair is generated, we can connect via ssh to the server
Zentyal, using the main admin console user as
identifier:

For this first connection, the administration console user password
will be needed to connect remotely:

And here we are on the server via remote access:

We will create a hidden folder, where we will store the public key of the administrator computer
in a key authorization file, in order to limit the ssh access:


Enter the public key retrieved via notepad in the path "C:\Users\
user_adm/.ssh/id_rsa.pub”:

Once the key is registered we will configure the ssh service to secure the keys access, then go to the ssh configuration file:

Uncheck the Hostkeys:

Then uncheck “PermitRootLogin” and put “no”, “PubKeyAuthentication yes”,
and finally “AuthorizedKeysFile”:

Uncheck “UseDNS” and change the value to “no”:

Arrived at the "Subsystem" section, check it then add this line below to
force the use of sFTP:
And finally, let's limit access only to the user of the administration console, by
adding at the bottom:

For the changes to be taken, simply restart the service
ssh with the following command:

Once the service has restarted, we can connect to the server via ssh by
filling in the console the user and the associated passphrase:

And here we are on the Zentyal server:

From now on only the administrator workstation can connect to the server,
so we have limited remote access to the server.
HTTPS Repository Source
LDAPS Source
Certification Authority Source
Fail2ban Source
portsentry Source
SSH Source
1. SECURE REPOSITORY.
Linux distributions usually come with insecure repositories in
http, so we will switch them to https as much as possible, because some
Zentyal repositories are not available in https.
To do this open a terminal window and enter the following command for the socket
support for https repositories:
Code: [Select]
sudo apt install apt-transport-https -yFrom now on we can change http repositories to https.
In a terminal window:
Code: [Select]
sudo nano /etc/apt/sources.listTo change the sources, just add an "s" at the end of http, in my
example below I unchecked the deb-src, see type of archives.
Save your changes with "ctrl+x" then "y" and finally hit enter.
n addition we can also change the security http repositories by a mirror
supporting https, to be chosen according to your geographical location
to limit latencies, see archive mirrors.
In my example I chose the plusserver mirror:
Once the repositories have been changed, simply reload the sources with the command
next:
Code: [Select]
sudo apt updateEdit:
Since 20 June Zentyal HTTPS repository are available.
2. CERTIFICATE AUTHORITY.
We will add a self-signed x509 certificate to access the console
administration in https, which by default is in http.
Go to Certification Authority in the administration console:
Then create a new certificate:
Once created we can see it in the list of current certificates:
Now you have to apply the certificate to the web server, go to "Services
certificates” and tick the services you wish to certify:
To take effect, save your changes and then close the console
administration. Upon reopening and after accepting the risk, you will see
appear https in the navigation bar.
3. LDAPS CONFIGURATION.
By default the port used by the directory is 389 which is not safe, we will force
using secure port 636.
For support it is necessary to enrich the samba configuration file
found in "/usr/share/zentyal/stubs/samba/smb.conf.mas" by adding
the location of the certificate created previously.
In a terminal window:
Code: [Select]
sudo nano /usr/share/zentyal/stubs/samba/smb.conf.masDans la section [global] rajoutez ces lignes:
Code: [Select]
tls enabled = yes
tls keyfile = tls/key.pem
tls certfile = tls/cert.pem
tls cafile = tls/ca.pem
tls priority = NORMAL:-VERS-TLS1.0:-VERS-TLS1.1
We will restrict the access rights to the certificate key, go to the
certificates folder:
Code: [Select]
cd /var/lib/samba/private/tlsCode: [Select]
sudo chmod 600 key.pemFinally we will restart the samba services:
Code: [Select]
sudo zs samba restart4. FAIL2BAN CONFIGURATION.
Short presentation of fail2ban, it is an intrusion prevention system that
allows you to ban source ip addresses that attempt to connect without your knowledge to
some services, such as ssh.
We are going to install fail2ban, in a terminal window:
Code: [Select]
sudo apt install fail2ban -yEnable the service on every boot:
Code: [Select]
sudo systemctl enable fail2banCheck the service status:
Code: [Select]
sudo systemctl status fail2banLet's move on to configuring the plugins:
Code: [Select]
sudo nano /etc/fail2ban/jail.d/defaults-debian.confRajoutez les plugins à surveiller ainsi que le temps de bannissement:
Code: [Select]
[sshd]
enabled = true
port = 22
[DEFAULT]
bantime = 86400
maxretry = 2
ignoreip = 127.0.0.1/8 server-ip admin-client-ip
[nginx-http-auth]
enabled = true
port = http,https
In the example the ssh and nginx plugins have been chosen, with a time of
ban of 24 hours estimated in seconds, as well as 2 attempts maximum.
Do not forget to add to the "ignoreip" list the ip address of your
server and the administrator workstation, at the risk of being blocked by fail2ban.
Restart the service for the changes to take effect:
Code: [Select]
sudo systemctl restart fail2banCheck the logs:
Code: [Select]
tail -f /var/log/fail2ban.log5. PORTSENTRY CONFIGURATION.
portsentry is a "portscan" detection and blocking program, ideal
to hide services using specific ports.
Installing portsentry:
Code: [Select]
sudo apt install portsentry -yEnable the service on every boot:
Code: [Select]
sudo systemctl enable portsentryCheck the service status:
Code: [Select]
sudo systemctl status portsentryConfigure the file with the ip addresses to ignore, those of the server and administrator station:
Code: [Select]
sudo nano /etc/portsentry/portsentry.ignore.staticBy default portsentry does not block any ip, we will go to the file of
configuration of it and modify so that the blocking is effective:
Code: [Select]
sudo nano /etc/portsentry/portsentry.confSet Ignore Options BLOCK_UDP/TCP to "1" for blocking support:
“Dropping Routes” section, check that the following line is uncommented:
Same for the “TCP Wrappers” section:
“External Command” section, add this long line and uncomment
KILL_RUN_CMD_FIRST with a value of “1”:
Code: [Select]
KILL_RUN_CMD="/sbin/iptables -I INPUT -s $TARGET$ -j DROP && /sbin/iptables
-I INPUT -s $TARGET$ -m limit --limit 3/minute --limit-burst 5 -j LOG
--log-level debug --log-prefix 'Portsentry: dropping: '"
Section “Scan trigger” value “0” to “1”:
For automatic detection of the ports used, simply go to the file
/etc/default/portsentry:
Code: [Select]
sudo nano /etc/default/portsentryPassez en mode «atcp» et «audp» puis redémarrez le service:
Code: [Select]
sudo systemctl restart portsentry6. SSH CONFIGURATION.
To connect remotely to our server and maintain it, we
we need the ssh service and of course secure it to limit access.
First of all we will open port 22 on Zentyal which by default is closed, to
to be able to access the ssh via administrator post, open a terminal and enter the
following command:
Code: [Select]
sudo nano /etc/ssh/sshd_configOnce in the configuration file uncheck port 22 and restart the service:
Code: [Select]
sudo systemctl restart sshdLet's go to the administrator workstation on which we will generate a
new pair of ssh keys, for this open a command window and enter the
next line:
Code: [Select]
ssh-keygen -t rsa -b 4096This command allows us to create an rsa key pair with a length of
4096 bit.
The following message asks where to store the key pair, let the location per
default:
Fill in a robust passphrase respecting the security policy with the help of the
KeePassXC password manager:
Once the key pair is generated, we can connect via ssh to the server
Zentyal, using the main admin console user as
identifier:
Code: [Select]
ssh user_console_adm@adresse_ip_zentyalFor this first connection, the administration console user password
will be needed to connect remotely:
And here we are on the server via remote access:
We will create a hidden folder, where we will store the public key of the administrator computer
in a key authorization file, in order to limit the ssh access:
Code: [Select]
mkdir .sshCode: [Select]
cd .sshCode: [Select]
sudo nano authorized_keysEnter the public key retrieved via notepad in the path "C:\Users\
user_adm/.ssh/id_rsa.pub”:
Once the key is registered we will configure the ssh service to secure the keys access, then go to the ssh configuration file:
Code: [Select]
sudo nano /etc/ssh/sshd_configUncheck the Hostkeys:
Then uncheck “PermitRootLogin” and put “no”, “PubKeyAuthentication yes”,
and finally “AuthorizedKeysFile”:
Uncheck “UseDNS” and change the value to “no”:
Arrived at the "Subsystem" section, check it then add this line below to
force the use of sFTP:
Code: [Select]
Subsystem sftp internal-sftpAnd finally, let's limit access only to the user of the administration console, by
adding at the bottom:
Code: [Select]
Allowusers user_console_admFor the changes to be taken, simply restart the service
ssh with the following command:
Code: [Select]
sudo systemctl restart sshdOnce the service has restarted, we can connect to the server via ssh by
filling in the console the user and the associated passphrase:
And here we are on the Zentyal server:
From now on only the administrator workstation can connect to the server,
so we have limited remote access to the server.
HTTPS Repository Source
LDAPS Source
Certification Authority Source
Fail2ban Source
portsentry Source
SSH Source
4
Contributions / Tips&Tricks / Features Requests / X. ZENTYAL UPDATE. (Part 10/12)
« on: May 23, 2022, 11:56:12 am »
X. ZENTYAL UPDATE.
Particular caution when updating certain packages, especially
not overwrite the configuration files, present under penalty of serious
malfunctions. (take a snapshot before each update)
Update command:
Text output when updating a package's configuration file:

Absolutely keep the currently installed version and validate:

Particular caution when updating certain packages, especially
not overwrite the configuration files, present under penalty of serious
malfunctions. (take a snapshot before each update)
Update command:
Code: [Select]
sudo apt update && sudo apt full-upgrade -yText output when updating a package's configuration file:
Absolutely keep the currently installed version and validate:
5
Contributions / Tips&Tricks / Features Requests / IX. SHARED FOLDER CONFIGURATION. (Part 9/12)
« on: May 23, 2022, 11:48:51 am »
IX. SHARED FOLDER CONFIGURATION.
Go to the File Sharing tab:

Give a share name:

In the created share go to access control:

Choose the group or authorized users for this share:

On a client workstation disconnect/reconnect:

Go to the File Sharing tab:
Give a share name:
In the created share go to access control:
Choose the group or authorized users for this share:
On a client workstation disconnect/reconnect:
6
Contributions / Tips&Tricks / Features Requests / VIII. RSAT CONFIGURATION. (Part 8/12)
« on: May 23, 2022, 11:35:53 am »
RSAT CONFIGURATION.
Download windows 10 remote server administration tools:


Go to Apps & Features:

Select Optional Features:

Filter with RSAT:


Select the 20 modules:


Then join the domain.
Then go to System and Security then Administrative Tools:

Make desktop shortcuts:

Go to Active Directory Users and Computers:

Download windows 10 remote server administration tools:
Go to Apps & Features:
Select Optional Features:
Filter with RSAT:
Select the 20 modules:
Then join the domain.
Then go to System and Security then Administrative Tools:
Make desktop shortcuts:
Go to Active Directory Users and Computers:
7
Contributions / Tips&Tricks / Features Requests / VII. WINDOWS 10 CLIENT CONFIGURATION. (Part 7/12)
« on: May 23, 2022, 11:20:46 am »
VII. WINDOWS 10 CLIENT CONFIGURATION.
Go to Rename your PC to change NetBios:
 [/ur
[/ur
Once restarted, Rename your PC (advanced) to join a domain:
[url=https://imgbb.com/]
Authenticate with an account authorized to join a domain:

Successful authentication:

Log out and then log in with another user:

Successful Domain Login:

Then go to Proxy, activate the option and enter the server IP as well as the port and
register: (to be adapted according to present infrastructure)

To test the proxy, open an internet window and enter an NSFW site:

Go to Rename your PC to change NetBios:
[/urOnce restarted, Rename your PC (advanced) to join a domain:
[url=https://imgbb.com/]
Authenticate with an account authorized to join a domain:
Successful authentication:
Log out and then log in with another user:
Successful Domain Login:
Then go to Proxy, activate the option and enter the server IP as well as the port and
register: (to be adapted according to present infrastructure)
To test the proxy, open an internet window and enter an NSFW site:
8
Contributions / Tips&Tricks / Features Requests / VI. PROXY CONFIGURATION. (Part 6/12)
« on: May 23, 2022, 10:59:21 am »
VI. PROXY CONFIGURATION.
Go to the HTTP Proxy tab:

In general settings check transparent proxy:

Go to https://dsi.ut-capitole.fr/blacklists/download/ and download the
blacklist needed for the proxy, in a terminal copy the line below:
Go to the categorized lists tab and download the blacklist:

In Filter Profiles create a new blacklist profile:

Go to the blacklist profile configuration and edit the filters:


Finally go to Access rules to apply the filters:

Go to the HTTP Proxy tab:
In general settings check transparent proxy:
Go to https://dsi.ut-capitole.fr/blacklists/download/ and download the
blacklist needed for the proxy, in a terminal copy the line below:
Code: [Select]
wget https://dsi.ut-capitole.fr/blacklists/download/blacklists.tar.gzGo to the categorized lists tab and download the blacklist:
In Filter Profiles create a new blacklist profile:
Go to the blacklist profile configuration and edit the filters:
Finally go to Access rules to apply the filters:
9
Contributions / Tips&Tricks / Features Requests / V. LDAP CONFIGURATION. (Part 5/12)
« on: May 20, 2022, 04:29:11 pm »
V. LDAP CONFIGURATION.
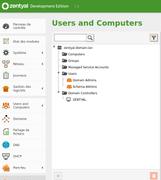
Go to the Users and Computers tab:
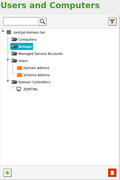
Then in Groups add user groups:
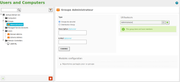
Creation of the Administrator group:

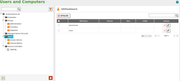
Create users with a 10 character password:
Assign users to the right groups:


Go to the Users and Computers tab:
Then in Groups add user groups:
Creation of the Administrator group:
Create users with a 10 character password:
Assign users to the right groups:
10
Contributions / Tips&Tricks / Features Requests / IV. CERTIFICATION AUTHORITRY CONFIGURATION. (Part 4/12)
« on: May 20, 2022, 04:17:58 pm »
IV. CERTIFICATION AUTHORITY CONFIGURATION.
Go to the Certification Authority tab:

Create a new certification authority certificate:[/] (to be edited according to the infrastructure
present)

List of certificates:

Go to the Certification Authority tab:
Create a new certification authority certificate:[/] (to be edited according to the infrastructure
present)
List of certificates:
11
Contributions / Tips&Tricks / Features Requests / III. DHCP configuration. (Part 3/12)
« on: May 20, 2022, 04:10:15 pm »
III. DHCP CONFIGURATION.
In the administration, console go to the DHCP tab:

Uncheck DHCP eth0:

In "Configuration" eth1: (don't forget to check dynamic dns)

Go to Ranges to address a new range of internal IP addresses: (differentiate the
internal address type from external)

Add and save the new address range:

Go to the Module Status tab:

Check DHCP and save:

In the administration, console go to the DHCP tab:
Uncheck DHCP eth0:
In "Configuration" eth1: (don't forget to check dynamic dns)
Go to Ranges to address a new range of internal IP addresses: (differentiate the
internal address type from external)
Add and save the new address range:
Go to the Module Status tab:
Check DHCP and save:
12
Contributions / Tips&Tricks / Features Requests / II. DNS CONFIGURATION. (Part 2/12)
« on: May 20, 2022, 03:59:37 pm »
II. DNS CONFIGURATION.
In the administration console go to the DNS tab:

Activate the transparent DNS cache and add the gateway: (to be adapted according to the infrastructure
existing)

Save changes: (to be performed after each setting or change)


Test DNS via PING the gateway:

In the administration console go to the DNS tab:
Activate the transparent DNS cache and add the gateway: (to be adapted according to the infrastructure
existing)
Save changes: (to be performed after each setting or change)
Test DNS via PING the gateway:
13
Contributions / Tips&Tricks / Features Requests / Ia. Software Raid configuration (Part 1a/12)
« on: May 20, 2022, 11:20:49 am »
Following the installation procedure, but with software raid support.
I. SOFTWARE RAID CONFIGURATION.
Choose expert mode installation:

Once in the partition disks menu, select “Manual”:

Go to the free space of the “sda” disk:

Create a new partition:

Choose the maximum partition size:

Then select the type of partition, logical in our case:

Change partition characteristics for raid volume:


Validate the end of the configuration:

Do the same operations above for the “sdb” disk.
Once the two raid volumes have been created, let's go to the software raid configuration:

Apply changes to disks:

Then create a multi-disk device:

Select “Raid1”:

Check the number of active devices, 2 in our case:

Leave the spare device count at 0:

Overview of active devices and selection thereof: (space to select)


Finish configuring volumes:

Finish partitioning and apply changes:

Appears a new Raid1 device:

Select free space to apply partition characteristics:

Apply the filesystem type, journaled ext4 in our example:

Select the partition mount point, root “/” in our case:


Finish setting the raid partition:

Finish partitioning and apply changes:


After applying the changes on the disks the installation of Zentyal continues
with software raid1 support.
Once the installation is complete, to verify the volumes, enter the command below
in a terminal:

We see a raid1 volume md0 belonging to disk sda partition sda5, same for
sdb5.
II. RAID MAINTENANCE
To display the status of a raid1 volume enter the following command:
Output of the above command:

To remove a bad volume: (* select the bad disk number)
To add a new volume:
Source
I. SOFTWARE RAID CONFIGURATION.
Choose expert mode installation:
Once in the partition disks menu, select “Manual”:
Go to the free space of the “sda” disk:
Create a new partition:
Choose the maximum partition size:
Then select the type of partition, logical in our case:
Change partition characteristics for raid volume:
Validate the end of the configuration:
Do the same operations above for the “sdb” disk.
Once the two raid volumes have been created, let's go to the software raid configuration:
Apply changes to disks:
Then create a multi-disk device:
Select “Raid1”:
Check the number of active devices, 2 in our case:
Leave the spare device count at 0:
Overview of active devices and selection thereof: (space to select)
Finish configuring volumes:
Finish partitioning and apply changes:
Appears a new Raid1 device:
Select free space to apply partition characteristics:
Apply the filesystem type, journaled ext4 in our example:
Select the partition mount point, root “/” in our case:
Finish setting the raid partition:
Finish partitioning and apply changes:
After applying the changes on the disks the installation of Zentyal continues
with software raid1 support.
Once the installation is complete, to verify the volumes, enter the command below
in a terminal:
We see a raid1 volume md0 belonging to disk sda partition sda5, same for
sdb5.
II. RAID MAINTENANCE
To display the status of a raid1 volume enter the following command:
Code: [Select]
sudo mdadm -D /dev/md0Output of the above command:
To remove a bad volume: (* select the bad disk number)
Code: [Select]
sudo mdadm --remove /dev/md0 /dev/sda*To add a new volume:
Code: [Select]
sudo mdadm --add /dev/md0 /dev/sda*Source
14
Contributions / Tips&Tricks / Features Requests / I. Installation and configuration of Zentyal 7.0 development (Part 1/12)
« on: May 20, 2022, 10:25:10 am »
I want to share with the community my work, done as part of my training, to avoid bleeding from the eyes this will be done in several parts.
I wish you a good reading.
INSTALLATION AND CONFIGURATION PROCEDURE FOR ZENTYAL 7.0 DEVELOPMENT
I. INSTALLATION OF ZENTYAL 7.0 DEVELOPMENT.
Choice of language and installation screen: (expert mode for raid configuration, see
software raid configuration procedure)


Choice of language and keyboard type:


Choice of external network card:

Choice of NetBios of the server:

Choice of username for the main account: (to change for another name)

Choice of a password with 12 characters and verification:


Choice of system clock:

End of system installation:

Installing Zentyal core packages:

A web window then opens to enter into the console: (accept because self-signed certificate)

Zentyal administration console, fill in the user created previously and its password at
12 characters:

Choice of Zentyal components:


Confirmation and installation of components:


Configuration of network interfaces:


Choice of external network IP address: (to be adapted according to the existing infrastructure)

Choice of internal network IP address:

Domain controller type selection:


Source
Source
I wish you a good reading.
INSTALLATION AND CONFIGURATION PROCEDURE FOR ZENTYAL 7.0 DEVELOPMENT
I. INSTALLATION OF ZENTYAL 7.0 DEVELOPMENT.
Choice of language and installation screen: (expert mode for raid configuration, see
software raid configuration procedure)
Choice of language and keyboard type:
Choice of external network card:
Choice of NetBios of the server:
Choice of username for the main account: (to change for another name)
Choice of a password with 12 characters and verification:
Choice of system clock:
End of system installation:
Installing Zentyal core packages:
A web window then opens to enter into the console: (accept because self-signed certificate)
Zentyal administration console, fill in the user created previously and its password at
12 characters:
Choice of Zentyal components:
Confirmation and installation of components:
Configuration of network interfaces:
Choice of external network IP address: (to be adapted according to the existing infrastructure)
Choice of internal network IP address:
Domain controller type selection:
Source
Source
15
Other modules / IDS/IPS doesnt work
« on: March 25, 2022, 02:42:17 pm »
Hi Zentyal user, after a couple of installation's under virtualbox, the IDS/IPS module is installed, and once activated it crashes nginx every time. I tested with default ids/ips settings, same thing.
Any ideas where it could come from?


Any ideas where it could come from?
Pages: [1] 2